Concrete project planner
How to Plan a Concrete Slab Pour
A step-by-step planning workflow that chains the gravel base, slab volume, bags versus ready-mix, order quantity, and cost into one supplier-ready concrete order.
Published 2026-07-20 · Updated 2026-07-20 · BuildMeasure Editorial Team
Next step
Turn your measurements into a material estimate
Enter the recorded dimensions in the calculator. It shows the calculated amount, wastage allowance, and a supplier-ready suggested order.
Use the Concrete Slab CalculatorOne pour, five planning stages
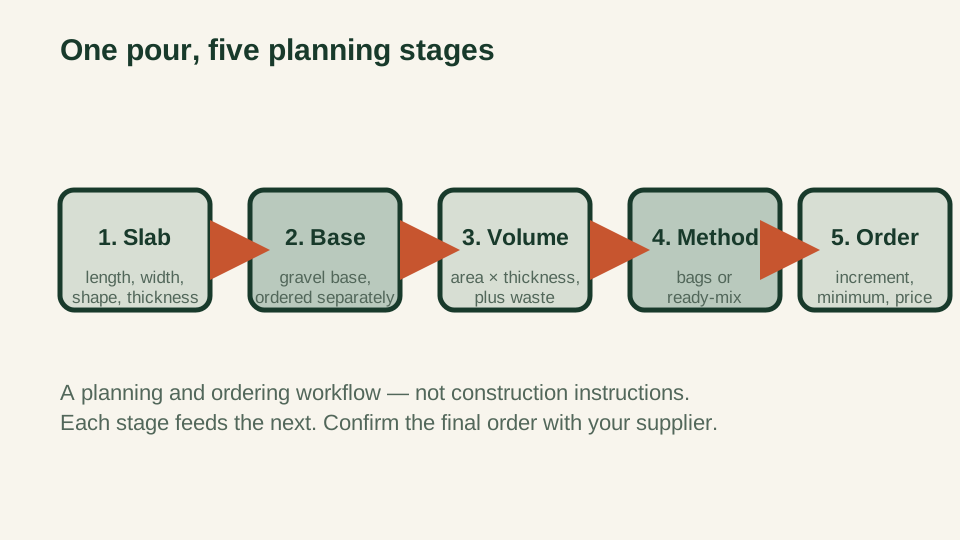
Planning a slab pour is a chain of measurements and decisions, not a single calculation. This planner connects the stages so each one feeds the next: measure the slab, measure the base under it, turn the slab into a concrete volume, choose bags or ready-mix, and settle the order quantity and cost.
It is a planning and ordering workflow, not a how-to-pour. Forming, placing, finishing, and curing are site work with their own requirements; this guide gets you to a confident, supplier-ready order and hands off cleanly to each specialist guide.
| Stage | What you decide or measure | Where it goes |
|---|---|---|
| 1. Slab | Length, width, shape, thickness | Slab area and dimensions |
| 2. Base | Gravel base depth under the slab | Base volume, ordered separately |
| 3. Volume | Slab area × thickness, plus waste | Cubic yards of concrete |
| 4. Method | Bags or ready-mix delivery | How the concrete arrives |
| 5. Order | Increment, minimum, price | Final quantity and cost |
Each stage links to a focused guide or calculator below. Confirm the final quantity and mix with your supplier.
Stage 1: measure the slab and fix its shape
Start with the slab itself. Measure the formed length and width, and settle the thickness from your plans. If the outline is an L, a T, or has a notch, split it into rectangles now so the area is defensible later.
The measure-a-slab guide covers a simple rectangle, the irregular-slab guide covers decomposition, and the area-versus-volume guide explains why the flat area is only half of the answer until thickness is added.
Stage 2: the gravel base is a separate volume
A slab-on-grade sits on a compacted granular base. That base is its own material with its own depth, measured over the same area as the slab and ordered separately — usually by the ton or cubic yard, and often from a different supplier than the concrete.
Measure the base before the pour, because it sets the finished level and therefore the slab thickness. The gravel-base guide walks through the base depth and how it relates to the slab above it.
Stage 3: turn the slab into a concrete volume
With the area and thickness fixed, the concrete volume is area × thickness, converted to cubic yards. Add a waste allowance for spillage, uneven base, and forms that do not fill to the exact edge, then round up.
The order-quantities guide separates the four numbers that people confuse here: the exact volume, the volume with waste, the supplier's rounding increment, and the minimum load. The slab calculator does the arithmetic and the rounding for you.
Stage 4: bags or ready-mix
How the concrete arrives depends on the volume and the site. Small slabs can be mixed from bags at your own pace; larger slabs are faster and usually cheaper by ready-mix truck, provided the truck can reach the pour.
The ready-mix-versus-bagged guide compares volume, access, working time, and labour, and the bag-yields guide converts a volume into a bag count when you mix by hand. Decide this before ordering, because it changes who you call and what you ask for.
Stage 5: order quantity, cost, and schedule
Finish with the order. Apply the supplier's increment and minimum load to your waste-adjusted volume, then enter your own supplier price and tax rate in the calculator for a cost estimate — the tool never invents prices.
Confirm the practical details that are easy to forget: the working time of the mix in the day's weather, truck access and chute reach, and when the surface can take foot or vehicle traffic. These are scheduling questions to settle with your supplier, not construction instructions from this guide.
The one-page project checklist
Work down this list in order. Each line links to a stage above and hands off to a focused guide or the calculator.
- Slab length, width, and shape recorded; irregular outlines split into rectangles.
- Slab thickness confirmed from your plans, not guessed.
- Gravel base depth measured and ordered separately.
- Concrete volume calculated, with a waste allowance added.
- Bags or ready-mix chosen to suit the volume and site access.
- Order quantity set against the supplier's increment and minimum load.
- Supplier price and tax rate entered for a cost estimate.
- Working time, access, and traffic timing confirmed with the supplier.
Same project
Related measurement guides
Sources and limits
Check the project-specific details
- National Ready Mixed Concrete Association (NRMCA) — Industry practices for ready-mix ordering, delivery, and minimum loads referenced in the order stage.
- NIST unit conversion reference — Reference for the exact foot and cubic yard definitions used across the workflow.
Review status: Formulas and conversions covered by automated tests; measurement practice pending human trade review.
This guide supports planning only. It does not specify structural design, code compliance, or a supplier quotation.